

Ever feel stuck with how to carry out setting up a successful garden? Many people do.
Gardening brings joy in every step: the planning, the planting, the caring, and the harvesting – whether you are harvesting tomatoes or picking a bouquet to give a friend. The benefits are genuinely worth the time and effort.
If you are looking to boost the nutrients in your soil, make sure you check out our home composting guide to learn about how to do something that is not only good for your plants, but also for the environment.
For many of us, gardening becomes a lifelong hobby. Being outdoors, watching things grow, enjoying nature, fresh air, and sunshine, and getting exercise all contribute to our physical and mental well-being.
At first, the idea can seem daunting – what do you want to grow, where is the best place in your yard, and even what tools you’ll need. Growing plants is amazingly rewarding, though, and the adventure is manageable and fun when you break it down into smaller steps.
To get started on your adventure, use the following tips and steps as a guide. From the beginning planning stages to caring for your plants, you’ll find helpful information.

Decide on the Type of Garden
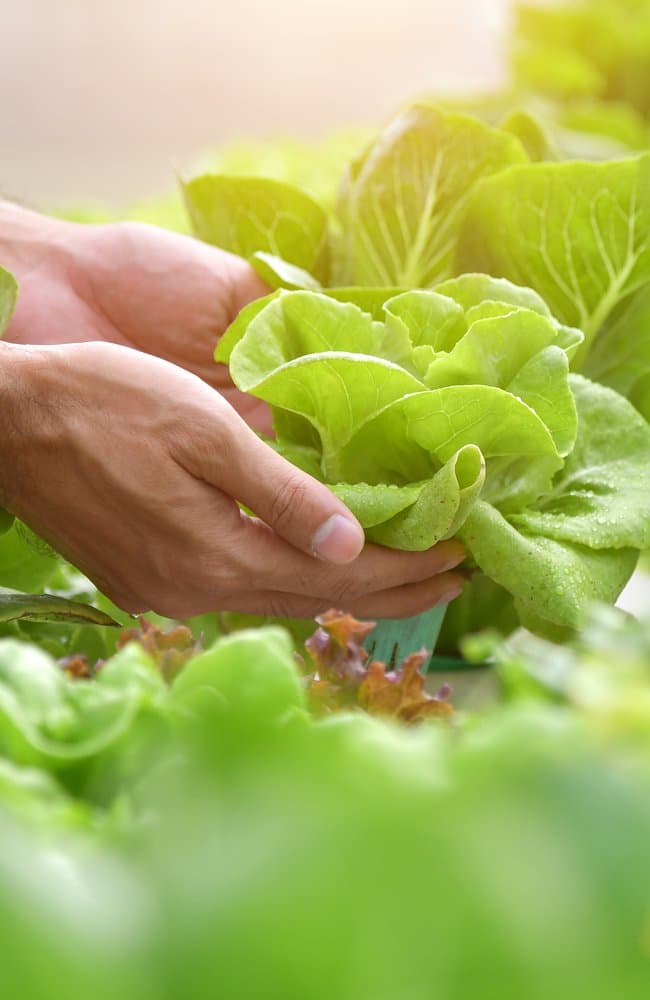
To get started, put some thought into what you want to grow. Do you want vegetables? Flowers? Trees and shrubs? Evergreens? Will you plant in-ground or use containers?
- Vegetable gardens bring the absolute freshest produce, fruits, and herbs to your table.
- Native gardens are a good choice for homes in or near wild areas – prairies, swamps, woodlands – and focus on plants that originated in the area.
- Shade gardens create a cool and restful retreat under a tree or between tall buildings using hostas, bleeding hearts, heuchera, and other shade-loving plants.
- Cutting gardens feature a riot of flowers blooming throughout the growing season, giving you non-stop bouquets while feeding pollinators.
- Cottage gardens have an “anything goes” style, sometimes called a grandma garden and filled with vegetation like roses, sweet peas, and hollyhocks.
- Rain gardens provide a solution for spots that never dry out and areas under downspouts. They also slow the flow of stormwater through your property.
- Pollinator gardens support birds, bees, butterflies, and bats by supplying nectar and host plants for our flying friends.
- Formal gardens scream elegance: clipped hedges, topiaries, roses on stands, and precisely placed flowers
- Container gardens are perfect for small spaces like patios, balconies, and terraces. They also work well where the soil is so poor, plant life cannot be supported.
- Raised bed gardens are similar to container gardening, only on a bigger scale.

Select the Best Placement
Before delving any further into this project, you need to figure out exactly where you will put your garden. Take a good look around your space (whether that’s a backyard or a patio/balcony) to decide on the best placement.
Check the Sunlight
Sunlight is one of the most critical aspects of growing trees, bushes, and flowers. They harness energy from the sunlight to drive photosynthesis, a metabolic process that occurs in the cells and fuels growth. As different plants need varying amounts of sunlight, it’s necessary to know how much sun exposure a site gets during a typical day.
Ask your how much rainfall your area receives? If it isn’t adequate, do you have access to a water source? How close is the source to your possible garden areas? Are you physically capable of carrying water to your vegetation, or do you have a hose that is long enough to reach? Can you set up a soaker hose for optimal growth?

Look at the Water Situation
Water works with sunlight to drive photosynthesis, making it essential for growth. Having enough water for your plants, whether through rainfall or supplemental irrigation, will make or break your success.
Ask your how much rainfall your area receives? If it isn’t adequate, do you have access to a water source? How close is the source to your plants? Are you physically capable of carrying water to your site, or do you have a hose that is long enough to reach? Can you set up a soaker hose for optimal growth?
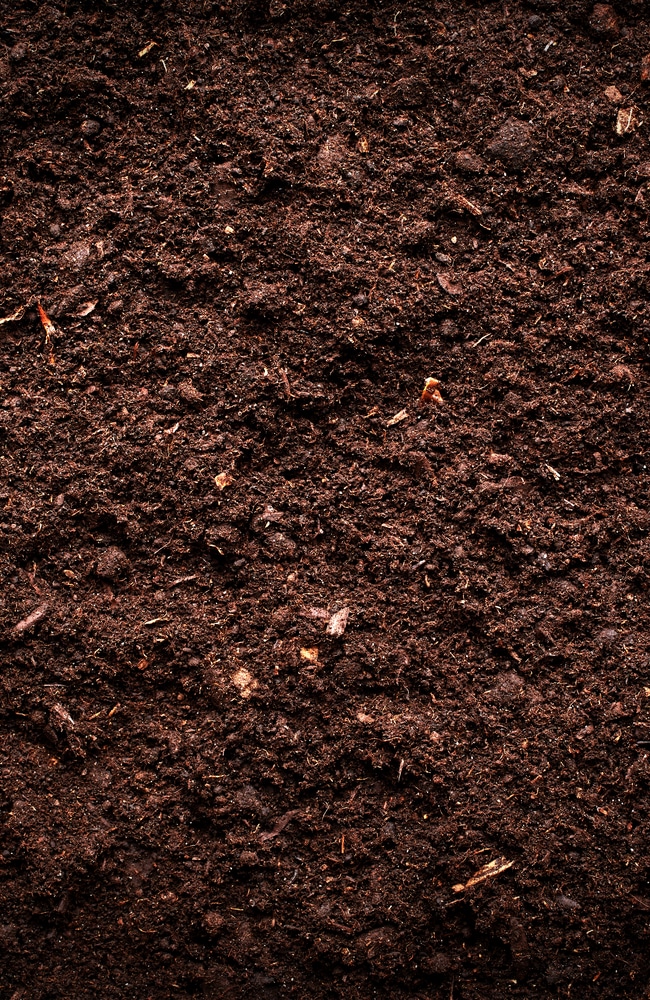
Assess the Soil
Without getting too scientific, you should have a general idea of your soil’s texture and pH.
- Soil texture is the amount of sand, silt, and clay particles and dictates water movement.
- Soil pH explains how how acidic or basic your soil is, i.e., what your plants use for “food,” react based upon the soil conditions. A soil pH that is too high or too low can make nutrients unavailable and cause deficiency problems.
There are ways to determine this yourself, or you can send a sample to a soil testing lab for analysis.
Watch the Wind Patterns
While wind is good for windchimes, it isn’t so great for plants. Wind can wreak havoc, beating plants up or snapping their stems.
Think about whether it is windy on a specific side of the house? Does it blow hard enough to tip over containers?
Determine What You Can Grow
In a perfect world, you could choose any plant to grow. Unfortunately, this isn’t a perfect world; your local climate plays a significant role in what you can grow.
Lookup Your Hardiness Zone
USDA Hardiness zones are a classification system designed to help determine what plants thrive in a specific area. It is based upon annual minimum winter temperatures and will help you know the length of your growing season and aid in choosing what to grow.
You can check your hardiness zone by accessing an interactive USDA Hardiness Zone Map online. Simply enter your zip code to find your zone.

Check Out Local Plants
Another way to get a feel for what you can grow is to wander around your town, looking at what other people are growing.
- Visit public gardens in your area. You can see plants at their mature size and get ideas on how form, texture, and color all work together.
- Walk around your neighborhood and see what other people are growing. Don’t be shy about asking your neighbors about their gardens. Most people are friendly and happy to share knowledge.
- Visit a garden center or nursery at a quiet time (like a drizzly mid-week afternoon) and look around. Their plants are selected to grow in your hardiness. And you can start to get an idea of how much things cost.
Set a Budget
Admittedly, this part of the planning process isn’t fun. Sit down and determine how much money you can spend. Trust me when say it’s very easy to get carried away, spending more money than you intended to, once you start buying.
When determining a budget, remember to account for all aspects of this project.
- Gardening tools
- Soil amendments
- Lumber for raised beds
- Containers
- Potting soil for raised beds or containers
- Plants and seeds
It may seem limiting the first year, but you can always expand the following growing season. If all you can afford the first year is a tree, then buy and grow that tree. Twenty years from now, you’ll be glad you did.
Make a Plan
This step is critical! Now that you know what you want to grow and where you what to grow it, take some time to make a plan. You will save yourself time, money, and energy IF you have a plan.
Start with a Small Garden
Really. Don’t make a plan to till under an acre of your yard the first year for veggies. Like any other hobby project, it’s best to start small. This gives you a feel for if you like gardening and how much time it consumes.
Take a little time to assess yourself. Think about how much time, money, and energy you have. Your plants will need to be watered. Weeds will need to be pulled and veggies harvested. Spent flowers need deadheading.
Maybe this means the first year you build just one raised bed instead of creating a huge vegetable garden. Or start with a single tomato and basil – yay, you can make an awesome Caprese salad!

Sketch it Out
Roughly measure the space and begin sketching. It doesn’t have to be elaborate; it can be a quick scribble on the back of an envelope! Draw out how many shrubs will fit along the fence, how many flowers will fill a container, and if you want two rows of carrots or three.
Choose between Seeds and Plants
Decide now if you are starting from seed or not. Starting them from seed is much cheaper but takes longer. Remember that some seeds can be sown directly in the soil; others will benefit from a head start on a sunny windowsill.
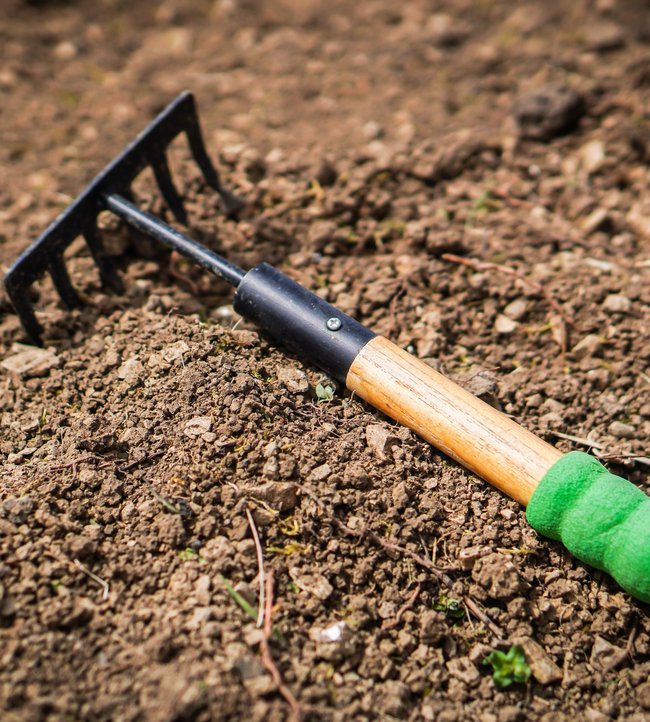
Purchase Basic Tools
If you have never gardened before, you will need to buy some tools for your first season. Pick the supplies that best suit your needs (obviously, if you are container gardening, you don’t need a soil rake) and buy the best tools you can afford. With proper care, they will last a lifetime.
Depending on your budget, you may need to purchase “must-have” tools in the first year and then add the “nice to have” tools in years to come.
Keep in mind, these lists are recommendations and depend upon what you will be growing. Something to dig with and something to water with are the bare minimum. If you are starting a vegetable garden and need to work the ground, you can rent a tiller or hire a local landscape contractor to till the soil for you.

Must-have Tools
- Gloves
- Hand trowel
- Round-point shovel
- Pruning shears
- Hose with adjustable nozzle
- Watering can
- Hoe
- Leaf rake
Tools that are Nice to Have
- Flat-end spade
- Rake
- Digging fork
- Loppers
- Pruning saw
- Garden knife (Hori Hori)
- Scuffle hoe
- Wheelbarrow
- Rototiller
Prepare Your Soil
It’s essential to take some time and prepare the soil. This step is often overlooked or ignored, but soil prep is a fundamental element.
Why is Soil Important?
For many people, they think dirt is dirt, and it’s merely something that gets under their fingernails or tracked into the house. But it plays a crucial role.
- Soil provides necessary nutrients, water, and oxygen.
- Soil provides support needed to anchor roots.
Working the Garden Bed
Working the soil breaks up any hard dirt clods and removes foreign objects so the roots can grow down and outward. It also improves aeration and drainage.
- Remove any weeds, grass, and large rocks from the surface.
- Using a tiller, shovel or rake, loosen the soil to a depth of 8 to 12”.
- Rake the surface smooth, leveling out low spots.
Don’t work your soil when it’s wet and be gentle with it. Avoid compacting the soil by walking heavily on it or repeatedly driving equipment over it.
Amending the Soil
You may need to add soil amendments to improve soil texture, drainage, or water holding capacity. The best way to do that is to add organic matter – finished compost or well-rotted manure – to a depth of two inches over the entire garden and mix it into the existing soil.
The ideal soil pH is neutral or even slightly acidic. Most plants prefer a soil pH between 6.0 and 7.5. If your pH lies outside this range, you can opt to find plants that will be happy in the existing soil, or you can change it by adding soil acidifiers or lime.
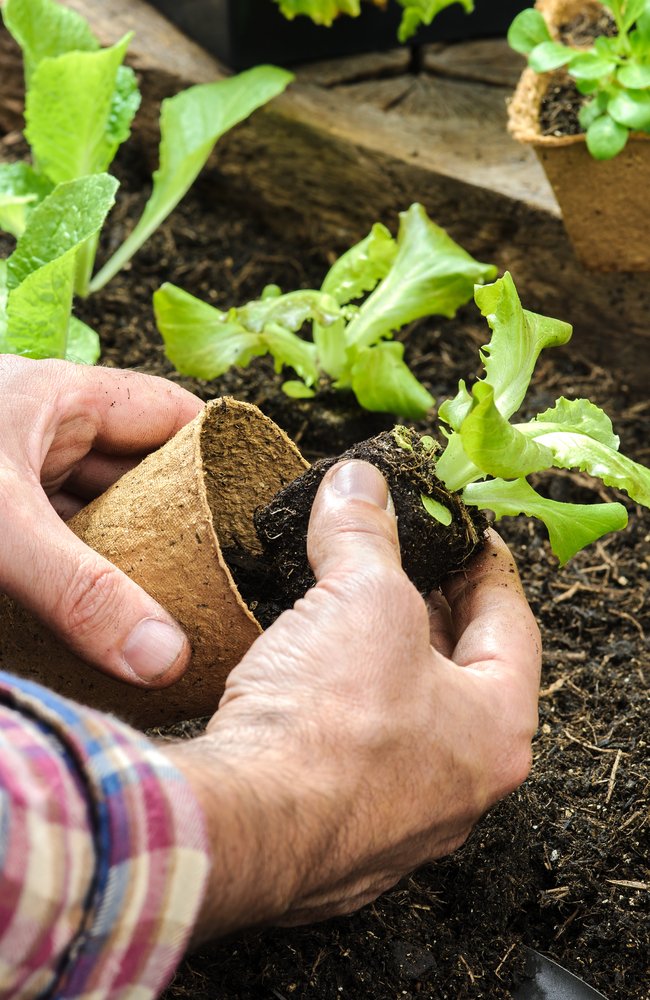
Shop for Plants and Seeds
Finally — the step you’ve been waiting for! All your research and preparation are about to pay off. By now, you should know what you want to grow, how many you need, and where to buy them.
When you go on your shopping trip:
- Look for healthy, sturdy plants that have been well-watered.
- Avoid buying anything that looks unhealthy.
- Choose flowers with unopened buds, not fully opened flowers.
Once you bring your new plants home, water them thoroughly before you plant them.
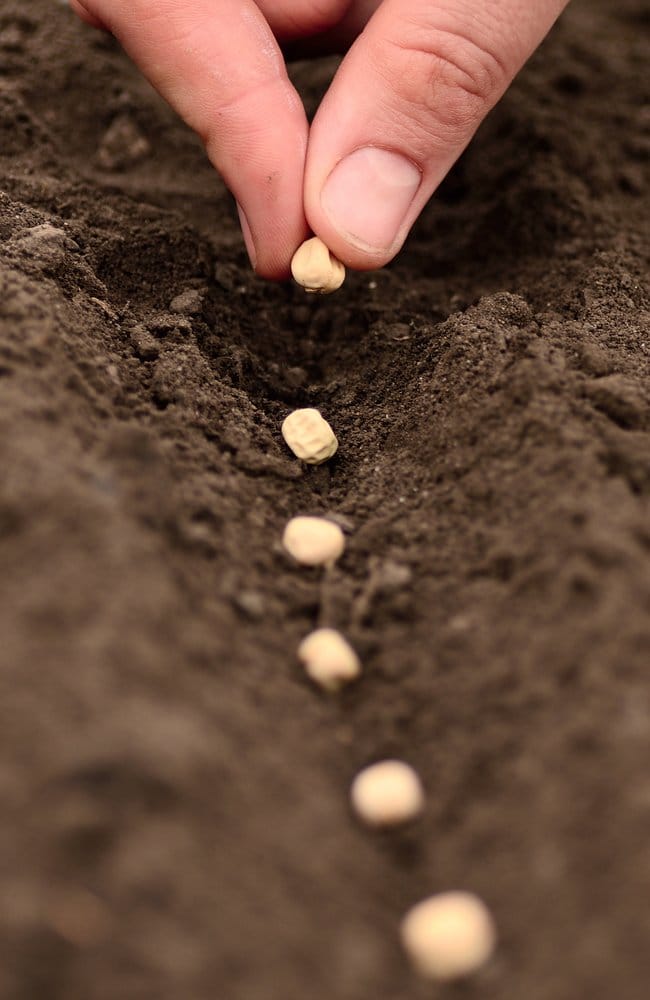
Dig in and Plant
Ready to dig right in? Hold on just a second. Let’s talk about a couple of things before getting dirty.
Planning the Right Time of the Year
Be sure you are planting at the right time of the year.
- When planting seeds, annuals, and tender perennials, wait until the danger of spring frost has passed.
- When transplanting trees, shrubs, and hardy perennials, research to see if they do better if transplanted in the fall or early spring.
Be sure you are planting under the right conditions. Doing it in adverse conditions creates undue stress which slows down growth.
- Do not plant in very wet or parched soil.
- Do not plant on sweltering days.
Spacing and Hole Size
Proper spacing keeps plants from competing for water, nutrient, and sunlight. It varies depending on the mature size of what you are planting. Check the tag or seed packet for recommendations and avoid the temptation to put them closer together.
The proper hole size accommodates the root ball, giving it a lot of room for the roots to get established. Dig a hole approximately twice as wide and slightly deeper than the roots. A wise old man once said, “Dig a five-dollar hole for a five-cent plant.”
Ongoing Maintenance
Once your flowers, vegetables, fruits, or trees are planted, they will need basic care. In general, they will need to be watered, fertilized, pruned, and checked routinely for pests.
How much to water, when to fertilize, and how to prune are specific to what you are growing. For detailed care, instructions check our care guides.
Enjoy Your New Garden
Now, onto the best part!
Sit back, relax, and enjoy the feeling of accomplishment. Your garden is off to the best possible start because of your hard work and planning!
Happy Gardening!