
Clearly losing the war being raged in your backyard, deep brown dirt patches cover every inch of your previously lush greenery.
Bare and brittle with sprouts of crunchy dead grass, your vegetation resembles a dry desert more than a nourished lawn. Maybe water can fix it, you think, but the liquid only makes the deep brown consuming your grass transform into large pools of black. Well, that didn’t work.
That’s when you realize there might be another option: thick loose tracks of flourishing green blades of grass. You know they use these pieces of sod in golf courses and sports stadiums, but is it worth it to do on your own lawn? How do you install them, keep them healthy, and ensure that they’ll revive your dying lawn?
Luckily for you, this guide will answer these question, as you’ll learn about the benefits and drawbacks of a sod lawn. More specifically, this guide will go into depth about how to care for it and some general frequently asked questions regarding building a new lawn with it.
If you’re making a lot of changes to your lawn, you probably also want to consider ways to prevent having a muddy lawn. Since you’re fixing your lawn now, mine as well do it right the first time around.
Advantages and Disadvantages
Advantages
Immediate Satisfaction
While you can’t walk on new sod that has just been laid onto the soil, it still gives the impression of a finished lawn. Instant gratification isn’t always a bad thing. Depending on your particular circumstances, immediate results could be necessary especially if you’re getting ready to sell your home. After all, lawns can increase the value of your property by up to 20%.
No Weed Issues
If you use a quality supplier that has been certified by the state, you will have little to no weed interference on your turf.
Excellent product will outdo weeds that try to move in because it is a semi-established grass plant from the moment it is placed on the soil. This is not the case with overseeding your lawn since weed seeds will offer real competition to new grass seeds.
Establishes Roots Quickly
New sod that has been handled, installed and cared for correctly will generally establish a shallow root system in the soil within 2 to 3 weeks. Once the root system is established, the lawn can withstand regular traffic from people and pets.
But, ultimately, most of us don’t take care of our lawns for the sole purpose of the aesthetic it provides. We want it to be functional as well and using this fresh grass mechanism will be functional and beautiful faster than grass seed.
Erosion Control
If you’re experiencing problems with soil erosion or runoff, using new sod in the area will immediately help with the situation.
Think of it as a weighted blanket on your soil. It offers protection from the elements and its weight will hold the topsoil in its place.
Workable Timing
You can install it at any point during the growing season so long as you avoid installing it in periods of extreme heat.
The roots will take holder faster during the peak of the season, but you are not bound by that time frame. Sod is already somewhat established before it is transported to your property, so it won’t take nearly as long to completely establish itself on your lawn.
As long as it’s within the growing season, you’re good to go.

Disadvantages
Higher Cost
Sod is more expensive to install than grass seed and there are costs associated with it that you might not initially consider.
Included in the cost is the money you are paying to transport it as well as the cost of proper installation. If you are not able to carefully lay it by yourself, you will need to pay someone to do it for you.
Short Planting Window of Opportunity
Generally speaking, you have between 24 and 48 hours from the time the it is cut from the ground to install it on your property. However, if you plan accordingly you won’t run into a problem with ensuring that it is laid down promptly. Just cover your bases and work out the logistics with your supplier beforehand.
Changes in Growing Conditions
Odds are that you are purchasing from a supplier that has space explicitly dedicated to growing it. These suppliers are able to create the optimal growing conditions for it to begin establishing itself.
Your soil will most likely not match the growing conditions of your supplier. Transplanting grass plants to soil with different growing conditions can sometimes, but not always, be a shock to the grass’s system.
Installing New Sod
Step 1: Measure the Space
Before you buy your sod, you’ll want to measure your space to buy the appropriate amount. When purchasing, try to have it delivered at a convenient time for you to plant it. Remember that once you receive it you will only have 24-48 hours to plant it.
Know How Much You Need
In order to determine how much you’ll need, measure the length and width of your lawn. Length x width = the square feet of lawn you will need to cover. You can divide this by 9 to convert to the number of square yards. Add 5% to that total to account for irregularities in the shape of your landscape.
Step 2: Prepare the Ground
Preparing the soil correctly by following the steps below will reduce the amount of water your lawn uses by up to 30%.
- Remove any rocks or debris from the area that is larger than 2 inches in diameter.
- Till the soil to a depth of 2 to 3 inches to aerate and break it down.
- Rough grade the soil away from your home and other structures to ensure proper drainage. Fill in any low-lying areas to prevent water from pooling.
- Add topsoil to achieve an ideal depth of between 4 and 6 inches of prepared soil. If you have clay soil, use compost as a soil amendment to help with drainage. You can also add compost to sandy soil to help it retain water.
- Test the pH level of the soil to ensure that the growing conditions are suitable for your new sod.
- Incorporate a starter fertilizer that is high in phosphorus into the top 2 to 3 inches of topsoil. Phosphorus promotes the strong, healthy growth of your grass’ root system and will supplement its establishment.
- Finally, lightly roll or tamp the soil into place to finish preparing the surface of the ground.
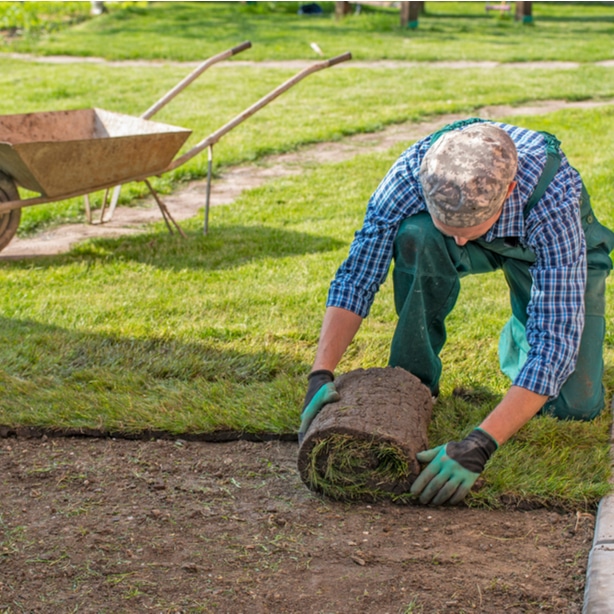
Step 3: Laying the First Row
Start by laying the first row of sod in a straight line. Use your driveway, walkway, or road as a reference to keep your row straight. Try to keep each of the edges pushed tightly together. But ensure not to overlap or leave dead space between the pieces because spaces could provide a window for weeds to establish themselves.
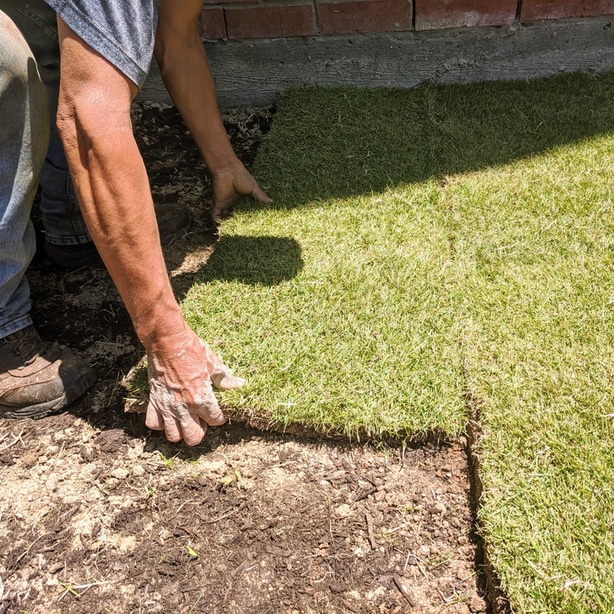
Step 4: Lay the Subsequent Layers
As you lay each line of sod, make sure that you stagger the joints so that they don’t line up with one another. Picture bricks in a wall if you’re having trouble. This staggering will ensure that you don’t create a fault line running through your grass.
When you encounter trees, shrubs, or flower beds, cut the sod into shape using a garden knife to ensure a tight fit in that location.
You only have one shot at this. If you feel like you need some assistance, there’s nothing wrong with calling a professional to ensure that it’s done the right way. You’ve spent a lot of money on this product and you don’t want to waste your investment on a problem that could have been avoided at the beginning.
Caring for New Sod
To care for new sod, you will need to water it appropriately and help it establish its root system. For the first two weeks of laying it down, don’t allow foot traffic on it. You’ll also want to hold off on mowing it until the roots are properly established.
Watering
Watering is done differently as time passes. So, let’s take a look at the watering schedule of it at different points in its life cycle.
Before Installation
You must water the soil before the sod’s installation because you want to create the optimal environment for it to properly take root.
It’s important to remember that your sod will be under a certain amount of stress. It was removed from the ground and transported to a new environment while most likely being tossed around in the process, after all.
For optimal conditions, you’ll want to keep the lawn moist but not wet; you cannot lay sod in muddy conditions and expect it to take root.
How often you should be watering the earth depends on the weather in your area of the country. During the hottest months of the year, you may need to water the ground up to 4 times a day before installation.
Whatever you do, just don’t let the ground dry out.

Installation Day
Begin watering the sod within 30 minutes of installation. The purpose is not only to water the newly installed turf, but it is also to moisten the ground beneath as well.
Initially, you’ll need to apply an inch or more of water to effectively dampen the first 3 or 4 inches of the soil. This first watering will take somewhere between 45 and 60 minutes. The exact amount of time will depend on what type of irrigation system you are using.
You’ll need to return and water the sod two more times the first day for around 15 minutes. You don’t want the water to pool on the surface. You just want to make sure that the water is absorbing into the ground and that you’re not creating boggy or swamp-like conditions.
Proper watering will make the soil of the ground and the sod more cohesive and blend them together. This will ensure good sod-to-soil contact and that the new root system has enough moisture at the outset to begin establishing itself.
2 to 15 Days after Installation
For the next 14 days, you’ll need to water the sod twice per day – once in the morning and once in the afternoon.
Watering for 15 to 20 minutes in the morning affords it cooler temperatures so that the water is not lost to evaporation. The best time for this is between 7 and 8 am.
You’ll also need to water the sod for 15 to 20 minutes between 1 and 2 pm. Watering in the early afternoon will supply it with enough moisture to thrive through the night. The remaining heat of the day will ensure that the excess water on the grass blades has evaporated before nightfall.
Day 15 through Day 21
At this point, you’ll cut the irrigation in half. You’ll only need to water the lawn once a day for 15 to 20 minutes. This is because you’ll need the water to absorb into the earth slightly beyond the root zone to encourage the new roots to grow deeper.
Do not water so deep that the water pools on the surface. This could drown the grass and wash the essential nutrients beyond the root zone.
At this point, you can begin to allow foot traffic on your yard and consider mowing it. But you’ll need to stop watering your lawn for 1 to 2 days before any of this activity can begin. You want people to enjoy your lawn, not damage it.
Beyond Day 21
After three weeks have passed, you can begin watering your lawn normally. Ensure that the lawn receives between 1 and 1 ½ inches of water per week through rainfall or irrigation for optimal growing conditions.
Fertilizing
Generally, sod is fertilized at the the supplier’s farm before harvest time and should not require additional fertilization before the roots have established themselves.
If you incorporated compost or another soil amendment before its arrival, you have hopefully provided it with sufficient nutrients to establish mature root systems.
If you notice discoloring of the grass or weakened, thin growth then you should ask the farm if they fertilized their product before they harvested it.
If they did not, it’s still not a good idea to fertilize it until the roots have established themselves in the soil. This can take from 30 to 60 days to accomplish depending on the soil in your yard. This is because unestablished roots will have trouble absorbing the nutrients from the fertilizer. The soil underneath will then leach the nutrients away from the roots until they have grown into the soil.
If you deem it necessary to fertilize your sod early on, look for a fertilizer that contains slow-release nitrogen. This will allow the grass to absorb the nitrogen over an extended period and will keep the nitrogen from burning the grass.
If you followed the steps above for laying sod, you have already incorporated a starter fertilizer into the earth. This should be more than enough to encourage healthy growth and root systems. An additional round of fertilization should not be necessary.
Mowing
Your new sod will be ready to be mowed for the first time about 14 days after installation. At this point, you will still see lines where each piece was placed, but the root systems should be establishing themselves. Never mow off more than ⅓ of the height of the blade.
You can see if your new sod is ready to be mowed by trying to pull it up at one of the corners. If it holds firm in place, then it is ready to mow. If it pulls up easily, the roots are not established in the turf and you shouldn’t mow it.
If you find that the roots are not established in a particular area, ensure you are watering that spot deeply and thoroughly for the next few days. Come back and recheck the root systems until they resist being pulled up.
When you’re confident that the sod is ready for mowing, you’ll need to ensure that the blades of your mower are sharp. This is new, fragile turf that you’re mowing. As such, you want to be certain that you are cutting the grass rather than tearing it. Tearing it causes undue stress to the plant, which is entirely preventable.
It’s important to use proper mowing practices. You are only cutting the top ⅓ of the grass blade. Any lower and you run the risk of scalping it. Determine the optimal mowing height for your particular type of grass. For most grasses, this is somewhere between 2 and 3 inches.
Use a riding mower sparingly in the beginning because its weight can damage the sod. Keep it in the shed until you’re certain that the roots are established and that the ground can hold its weight without causing ruts or the pieces of sod to shift in place.
Frequently Asked Questions
It’s always good to ask questions if you’re not sure about something. Here are some that homeowners ask me regularly.
How Long Does it Take for Sod to Establish its Roots?
Generally, most sods will establish a shallow root system in the soil in about 14 days. But you must keep traffic on yours to a bare minimum during this period. The turf is already under stress from being harvested and transported to your property. As such, it needs optimal conditions to establish its roots.
Full root establishment takes place between 30 and 45 days after installation. However, this time frame is contingent upon effective watering techniques. You want to water to absorb into the soil just beyond the depth of the roots. This will encourage the roots to grow deeper to find their water source.
How Long Does it Take to Install?
Typically, one person can install around 500 square feet of sod per hour. To estimate the amount of time it would take you, take the square footage of your lawn and divide it by 500. Keep in mind that it will take you longer to plant it around trees, flower beds, and other structures in your yard.

How Long Until I Can Mow?
You need to wait a minimum of two weeks to mow the new sod. Even then, it’s risky because the roots are only minimally established in the earth. I would wait for at least 3 weeks to give it a chance to grow deeper roots and for the grass blades to grow high enough to warrant cutting.
What’s the Best Time to Fertilize?
The best time to add fertilizer is before you install your sod. Adding a fertilizer high in phosphorous will help your roots establish themselves. After installation, you can apply a fertilizer with slow-release nitrogen after about 60 days from installation. But do not apply fertilizer for at least the first 30 days.
It’s important to remember that the plant is going to undergo a great deal of stress that may be expressed through discoloration and thinned growth. Don’t panic. Water the roots regularly and give them time to adjust to their new surroundings.
How Long Does it Take for Sod Lines to Disappear?
The lines between new sods usually take between 4 and 6 weeks to completely disappear. By practicing optimal installation techniques presented to you in this article, you may be able to reduce this to about four weeks.
When Can I Walk on My Sod?
You can walk on your sod at around two weeks. This is to allow it to establish at least a shallow root system. If you walk on it before its roots have been established, you decrease your chances of success. For best results, try to limit foot traffic for the first four weeks after installation.
How Do I Know My Sod is Fresh?
The best indication of a sod’s freshness is its soil. If the soil is moist and is clinging to the roots of the grass, then you’re probably in good shape. If you notice the soil is dry and flakes off, then you might want to start asking your supplier questions.
On the surface, look for grass blades that have a deep green and are cool to the touch.
Lastly, ask your supplier when it was harvested. Any reputable supplier will harvest their product in no more than 48 hours. Less than 24 hours is ideal.

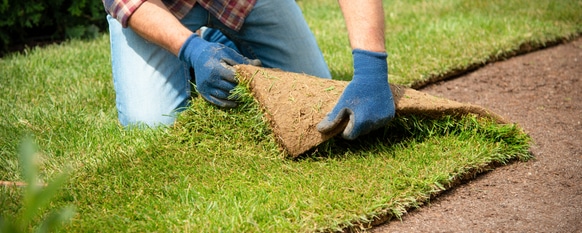
In What Forms is Sod Available?
Sod will either arrive in square or rectangle pieces or in a roll that can be installed simply by rolling it out over the ground. The rolls are perfect for larger areas that are more uniform in shape. The pieces are used best in smaller yards or yards with obstructions in the landscape.